In this Photoshop tutorial you will learn how to resize (or resample) a single image in Adobe Photoshop and also how to record an resizing action for resizing a multiple images at the same time.
DETAILS FROM THE VIDEO:
HOW TO RESIZE AN IMAGE FOR WEB IN PHOTOSHOP:
1. Open your image in Photoshop
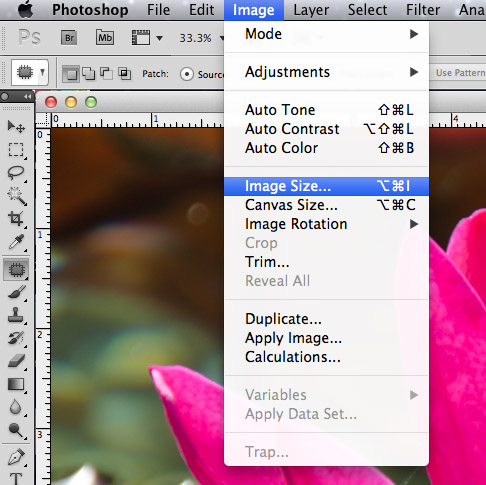
2. Click on Image -> Image Size in Menu bar:
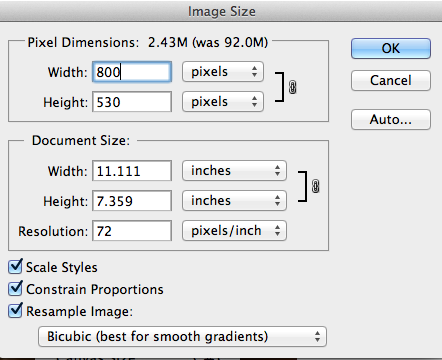
3. You will be presented with the following dialog:

4. First make sure that you have checked:
– “Scale Styles” (This is important if you have layers with styles in your images, like drop shadow for example. Then the stiles with scale together with an image. It would not hurt if you have it checked all the time )
– “Constrain Proportions” (You want you image to keep its proportions. So when ever you change image width for example, its hight will change automatically).
– “Resample Image” (This means we will be changing image pixel dimensions instead on document size. This is important if you resizing for web.)
Choose Resample Image method: Bicubic (best for smooth gradients) or Bicubic Sharper (best for reduction). It is up to you, but keep in mind that Bicubic Sharper will add some sharpening to the image. I personally prefer Bicubic and then I add sharpening by using Unsharp Mask filter.
Now it is time to set your Resolution to 72ppi (this is a good resolution for web, which will make your file size smaller without influencing the image quality).
After you changed your resolution to 72ppi, your Pixel Dimensions Width and Hight will change too. If you need to make an image even smaller you can type a desired Width and Hight by yourself. For your forum with of 800pixels should be ok.
Your should end up with window looking like this:
Click OK. Now you have the image of much smaller size.
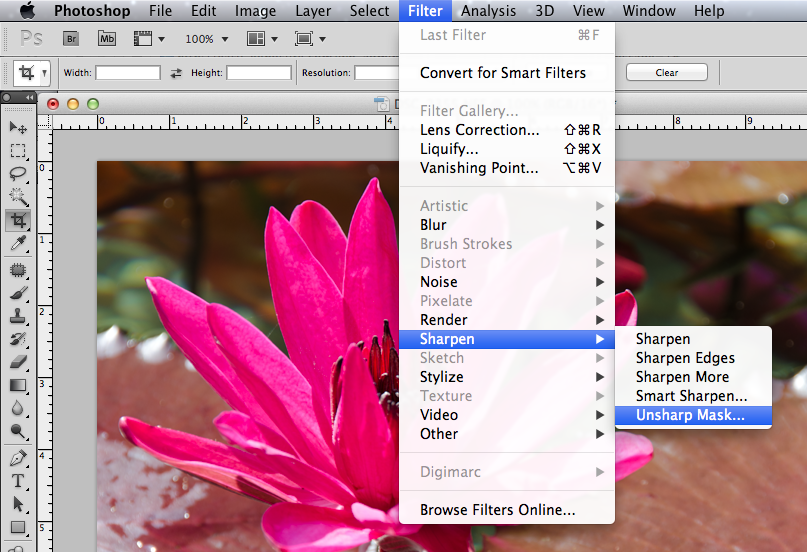
5. Now if you want you can sharpen the image. I usually use Unsharp Mask.
Click on Filter -> Sharpen -> Unsharp Mask in the Menu bar:
6. You will be presented with the following dialog:
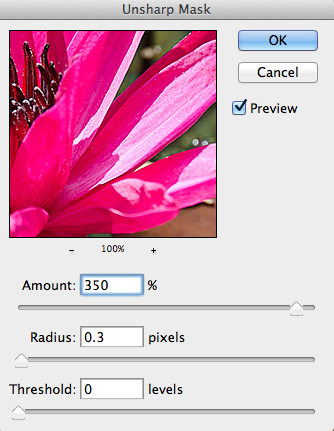
Amount: While you sharpening your image, Photoshop takes the edgebetween two colors and makes the light pixels lighter and the dark pixels darker. Amount of sharpening influense how light or how dark the pixels get.
Be careful and don’t set the sharpening Amount to high, because you might end up with grainy and too contrasty image. You can also lose some fine details.
Radius: Radius determines the area that will be sharpened. The higher the radius the wider area from the edge will be sharpened. This a low radius only pixels next to the edge will be sharpen.
The smaller the image the smaller radius you want to use.
Threshold: It determines how much contrast there needs to be between colors for them to be sharpened.
For some images by setting Threshold too low you can get a grainy image.
Different image might require a different amount of sharpening. If you have Preview checked, you can see right away way is happening with your image, when you are sliding the Amount, Radius and Threshold sliders.
Amount 200-400%, Radius: 0.2-0.3, Threshold 0 works good for resized for web images.
Before I used smaller amount and bigger radius, as I showed you in the video, but recently I discovered that combination above works better for resized for web images.
Click OK. Now you have resized and sharpened image.
7. Don’t forget to save your resized image:
– Click File – > Save As in the Menu bar.
– Chose the folder you want to save your resized image in. If you want to save your resized image in the folder where your original is, you have to rename it, otherwise your original will be overwritten by your resized image and we don’t want that.
– Set your Format to Jpeg
– Click Save
– You will be presented with the following dialog:
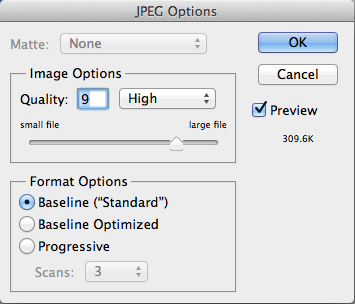
Here you can set the Image Quality. You don’t have to set it all the way to 12 to see the best results. You probably would notice a big of a different (if any at all) between 9 and 12. Even 8 should be ok. With decreasing the image quality, image size will decrease as well.
Click OK and your image will be saved.
RESIZE MULTIPLE IMAGE FOR WEB IN PHOTOSHOP:
1. You will have to have two folders: one with undersized images and another empty folder where all your resized images will go.
2. Open one undersized image in Photoshop.
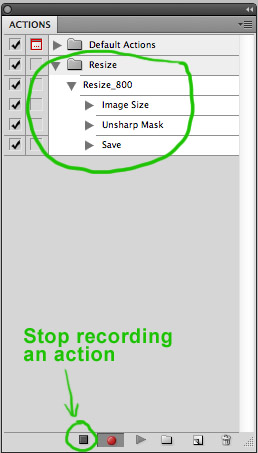
3. We are going to record an action of all steps and the apply this action to all the images. First of all make sure that action dialog is open.
If not click on Window -> Actions in the Menu bar:

You will get Actions dialog with looks like this:
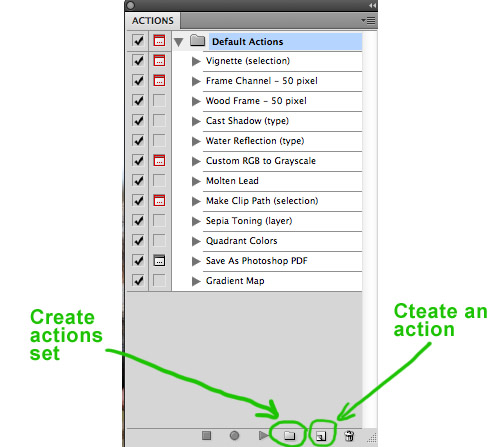
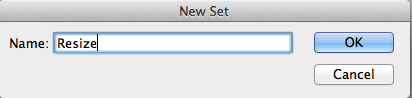
You have set of Default Actions in it already. Now it is time to create your own. First create Action Set and name it “Resize”, when create and Action and Name it “Resize_800”, by clicking icons show on the image above.
You will get this window for action set:
and this one for an action:
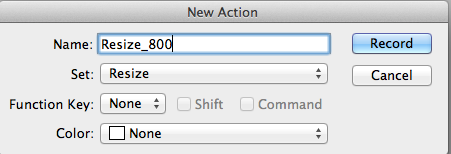
When ever you click Record your action start recording. All the steps you will do from now on will be recorded. You will have to Resize, Sharpen and Save the image as I showed you in the first part of this lesson.
As soon as you do all these steps they will show up in Actions dialog. After you done with all of them you will have to stop recording:
4. Now it is time to apply an action to all of the images.
Click on File -> Automate -> Batch… in the Menu bar:
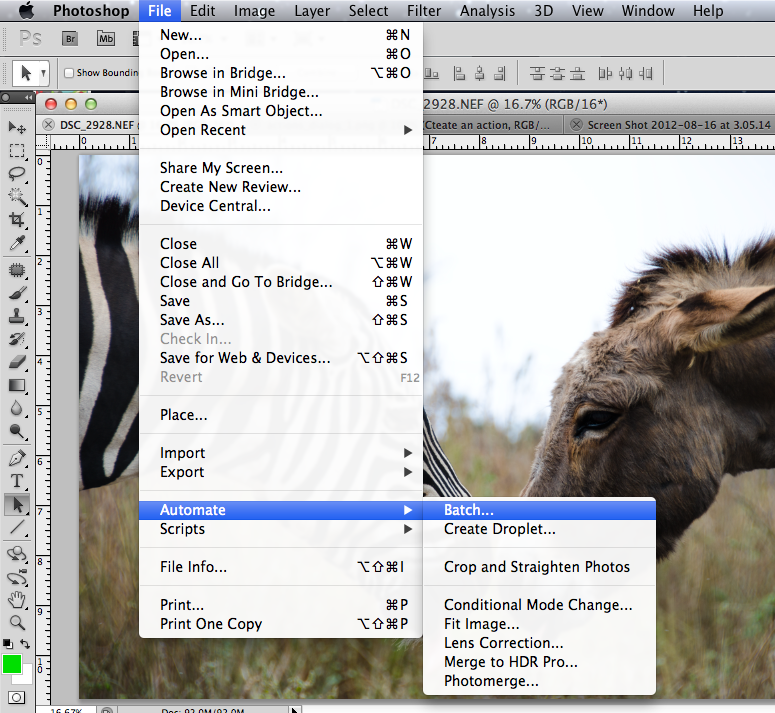
You will be presented with the following dialog:

– Choose set and action you just created
– Choose source folder with undersized images
– Choose destination folder, where do you want resized images to go
– Give files a name (you have a few options in drop down menu)
Click ok and all your files start to resizing.
Don’t try to resize too many images at the same time. But it all depends how powerful your computer is and how large the files are.
Thanks Oksana for your detailed videos, these are very helpful not only to amateurs but also to advanced amateurs( i consider myself like this which makes me feel better ). Can you make a video on photo editing using light room. btw u look beautiful.
Excellent
mine is adobe photoshop cc 2017 and my contents is different in image size window,
it has
image size,…..
dimensions…
fit to….
width …
ht….
can’t find scale style and constrain proportions…
did I miss something
resolution….
resample to….
yes, it is different in Photoshop CC.
If you want to resize your image for web, in Image Size Window first change your Resolution to 72 and then adjust your height or width.
For social media, I usually put 2000 pixels for a longer side (2000 pixels height for portrait images or 2000 width for landscape).
If you would like to post the image to Easy Exposure forum, you can make longer side 800 pixels.